Fiamma Bike Rack
On our last motorhome we had a Fiamma Bike Rack fitted which we used to carry our bikes whilst we owned the van. We are currently in a bit of a dilemma as to whether we will use our electric bikes with this Alliance van as we are not so keen on road cycling but wanted to retain the flexibility should we either change our minds or decide to add a Back Box to provide us with storage room. Initially we thought about a chassis mounted bike rack but were quoted £1600 which we thought was a bit steep given that it might never be used. An alternative, suggested by someone we know, was to consider a towball mounted rack. That would have the advantage that we could also use it to tow a small car, something that Margaret is not keen on! Even so the costs of that sort of set up is similar to the chassis mounted rack. This brings us back to the Fiamma Bike Pro Rack which we finally decided on at a cost of just over £200, so less important if we don't make much use of it. Fiamma now say that if you are carrying electric bikes you need to buy their upgrade package which basically replaces the part which the bikes rest on and beefs it up. The cost is an extra £150 so not likely to break the bank?
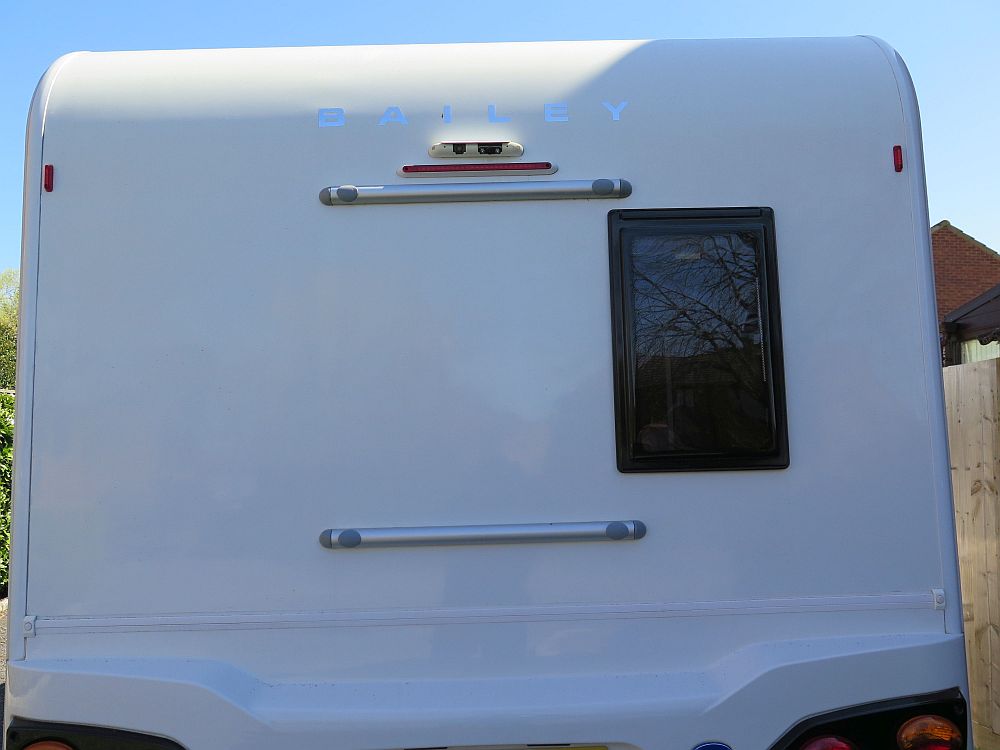
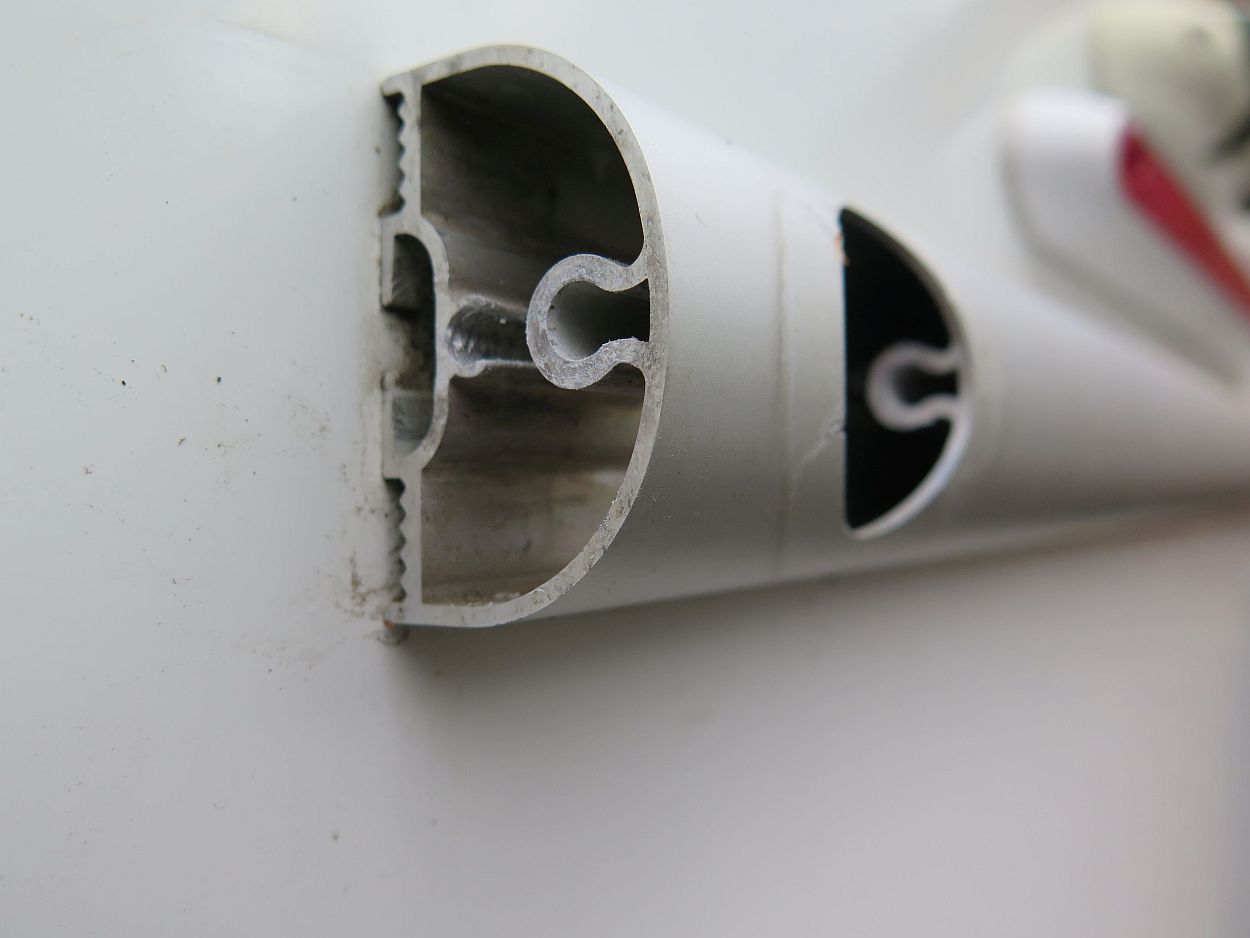
The next decision is whether you fit it yourself or ask your dealer to do it for you. That decision might rest on what is fitted to the motorhome in it's original form. Our Alliance comes with the fixing bars already in place so no need to drill through the motorhome wall to attach the fixing brackets which makes life much easier. Had we not had the ready fitted bars I think I would have got the dealer to fit it.
It is also important to establish the size of rack you require. This can be done by measuring the space between the centres of the grey bungs in the fixing bars and the same method can be used to measure the length. On our motorhome the horizontal spacing was 60 cms and the vertical was 80 cms. Having supplied these figures to Agent Fiamma they said that we needed the Cycle Pro M rack as it can deal with the extra vertical distance.
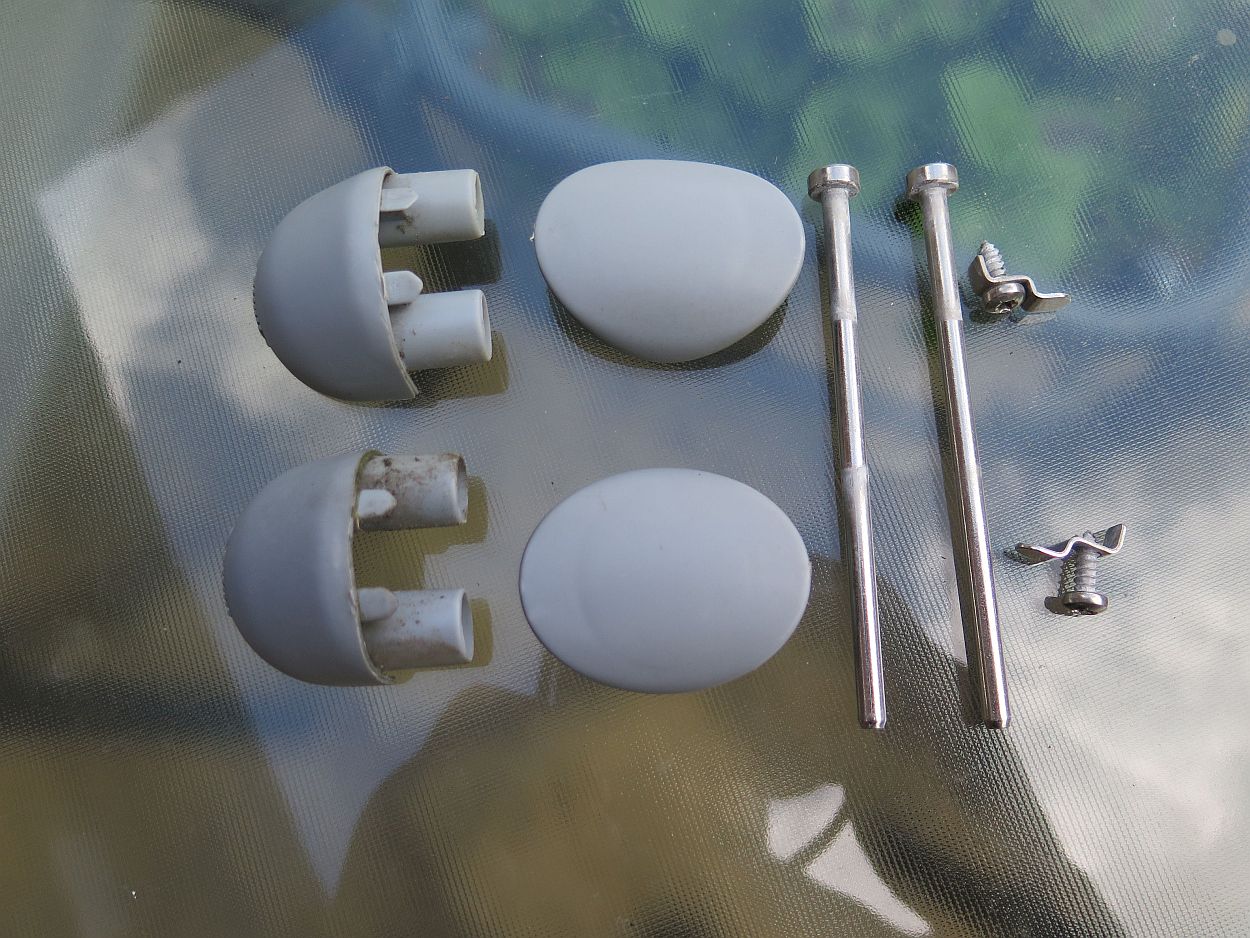
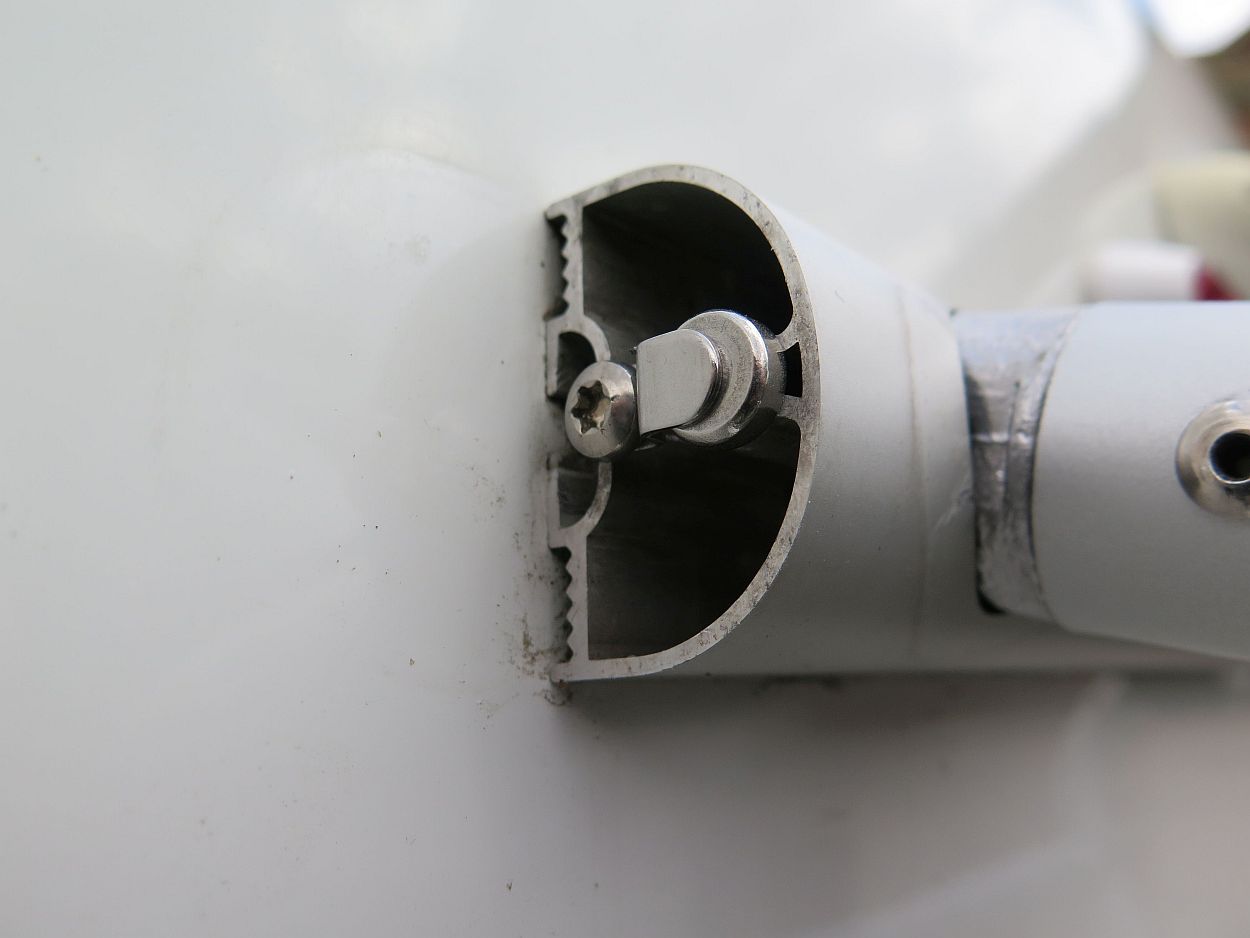
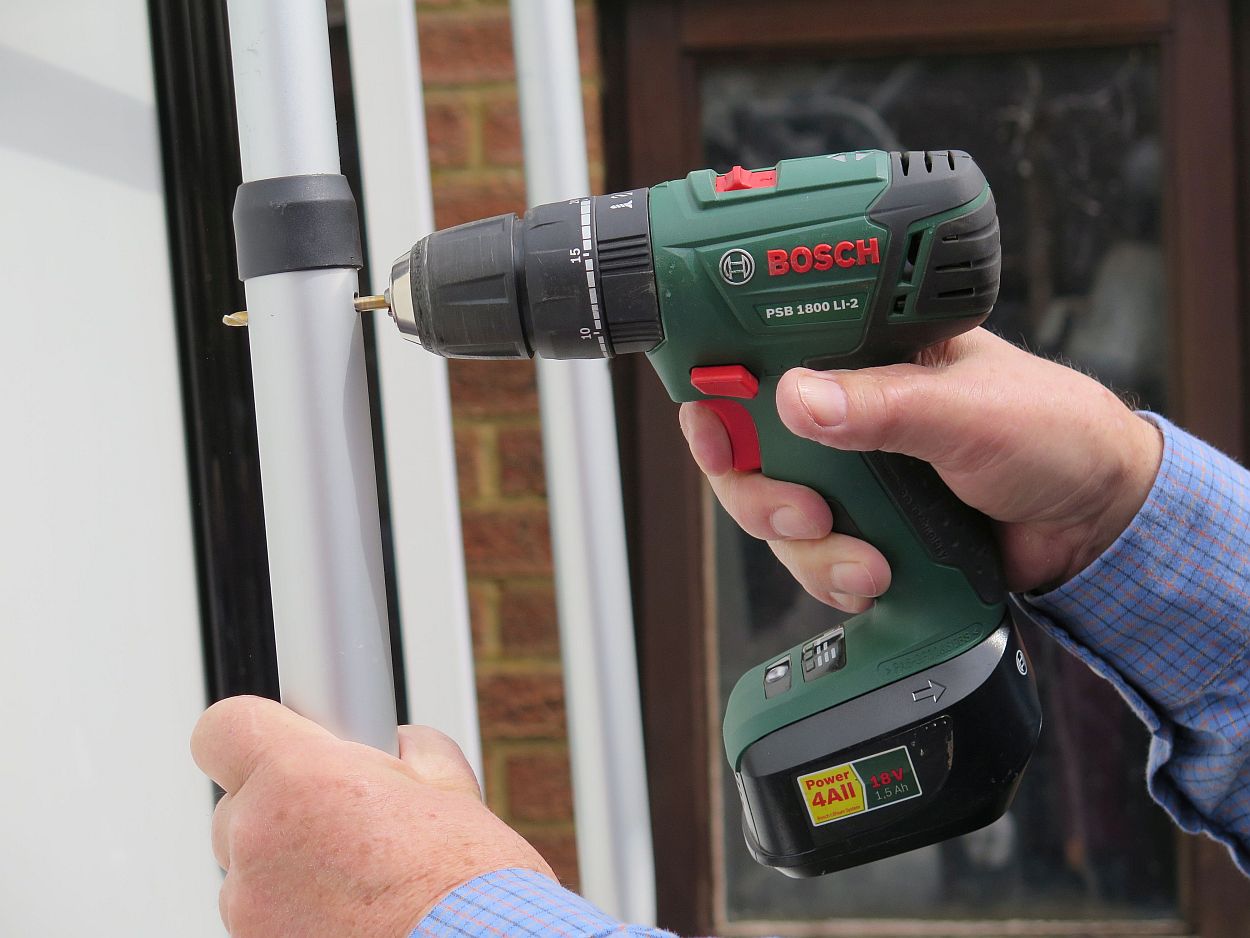
Once you have worked out the process the fitting is fairly straightforward. The four points where the rack attaches to the ready fitted bars are secured by long pins which are kept in place with a clip and a small screw. (see pictures below) To start you remove the end bungs which should just wiggle out. The bungs in the bar are secured in place by the pins that you will later use to secure the rack. You will need a star ended screwdriver to remove the small screws and clip. Depending on how long the pins have been in place they may need some help with a sharp ended tool to gently ease them out. Because the M rack is slightly longer than some it has an additional cross member which I found useful to assemble the top section complete which made it easier to fit into the top bar. The lower sections that fit into the bottom bar slide into the top section which allow adjustment depending on the horizontal distance between the bars. The bottom section is slightly different when it comes to fitting the pins as rather that hooks on the top part the pins go through the actual rack tube. I found I needed to open the holes slightly in order to allow the pins to go through these holes. When all four pins are secured in place you can replace the end bungs. The only other task, and the only one that requires drilling is to drill holes through where the top and bottom tubular sections join together in order to fit a bolt through.
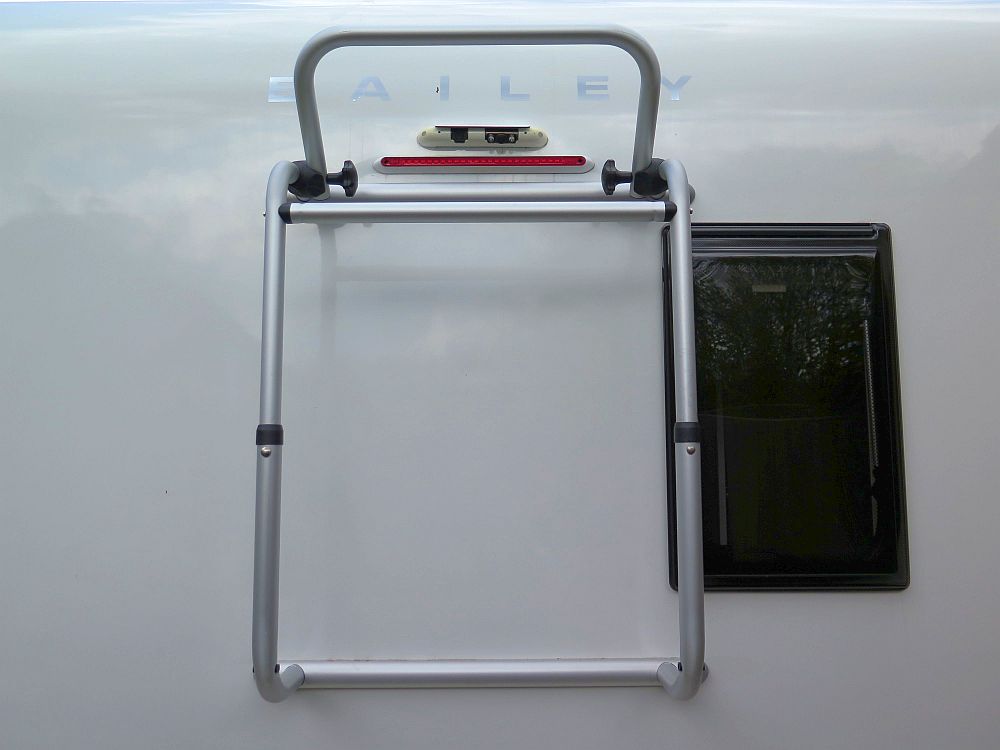
The final construction job is the fit the actual bike holder. This is held in place by two bolts. The instructions state that must maintain a certain distance between the bracket and the supporting bar to allow for the rack to fold. There are two push in plastic clamps that hold the folded rack in place. At the top of the rack fixed to the van is an adjustable cross bar to which you fix the cycle holding blocks. The rack comes with two one short and one long.
In the end it was not so onerous to fit as I first thought and the work can probably be completed in about an hour. The only tools required are aforementioned star/torx screwdriver. an electric drill and a couple small spanners.
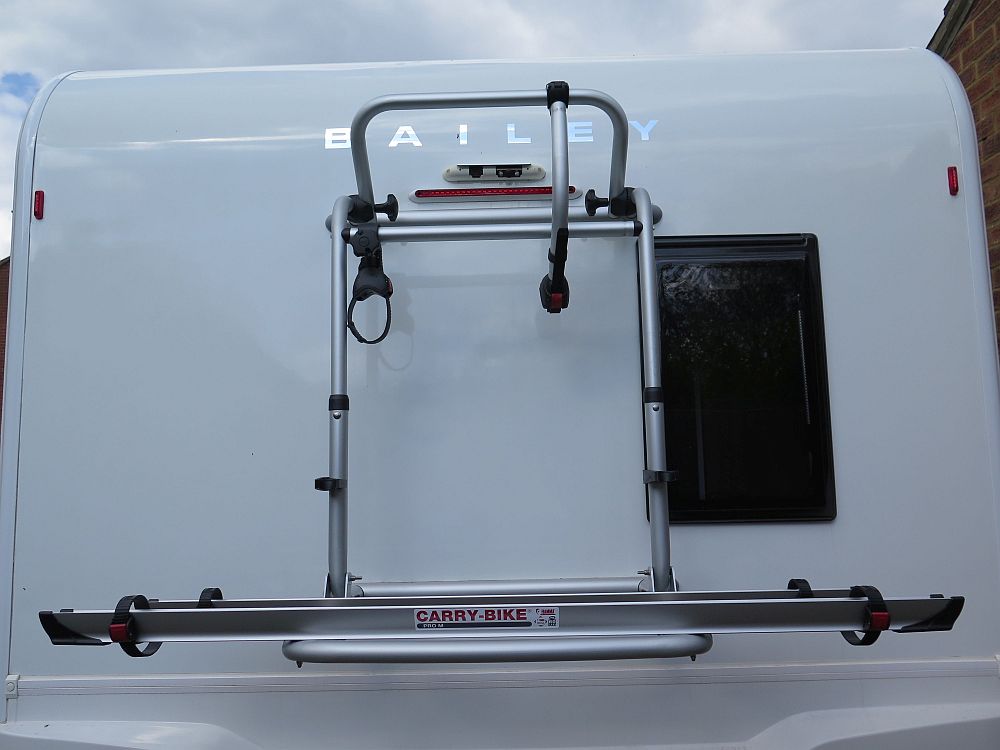
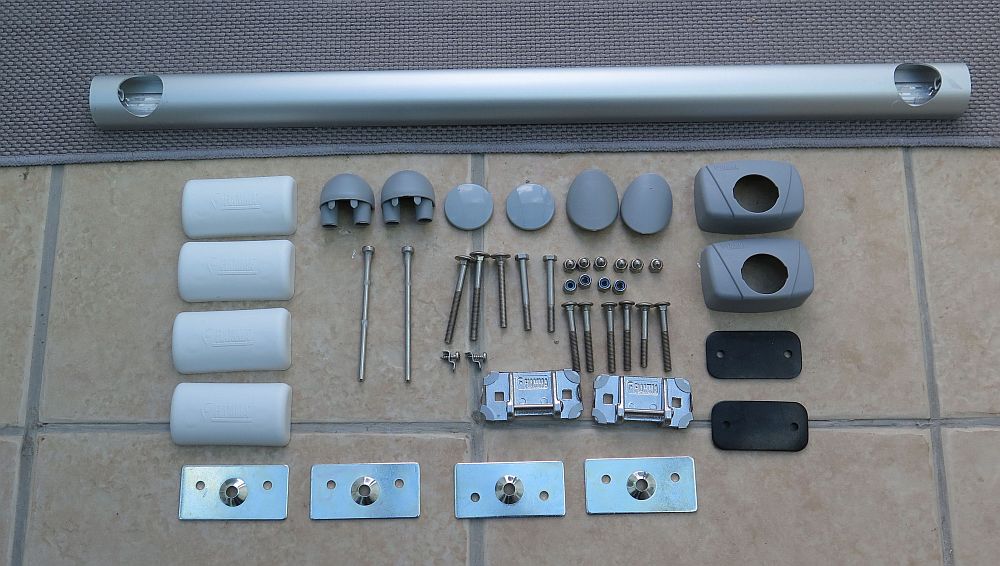
As a post script I should perhaps add that when you buy a Fiamma Bike Rack it comes with everything needed to fit to a bare back of a motorhome so because Bailey, fortunately, pre fit the support bars, you end up with quite a view bits you don't actually need. So no need to panic if at the end of the job you have bits left over!!!! See picture below.